Master Crispy Roasted Brussel Sprouts: Your Easy Weeknight Recipe
Are you on a quest for the perfect side dish that’s both healthy and irresistibly delicious? Look no further than this incredibly simple yet profoundly satisfying brussel sprouts recipe. Forget everything you thought you knew about these mini cabbages – no more soggy, bitter memories of childhood. This guide will help you create perfectly crispy, tender, and caramelized roasted brussel sprouts that will convert even the most skeptical eaters, making them a family favorite from the very first bite.
Whether you’re aiming for a quick weeknight dinner solution or an elegant side for a special gathering, this roasted brussel sprouts recipe is a true culinary chameleon. It requires minimal effort, frees up your stovetop for other dishes, and promises a flavor profile so enticing, you’ll want to keep this secret weapon in your cooking arsenal for every occasion. We’ll dive deep into the techniques that guarantee a fantastic texture and taste every time.
Before we begin, a quick note on nomenclature: "brussel sprouts" vs. "Brussels sprouts." While grammatically "Brussels sprouts" is correct, reflecting their Belgian origin, common usage often drops the 's' for simplicity. For the purpose of this article and its easygoing nature, we'll stick to "brussel sprouts" – just visualize that extra 's' if you prefer! The key, regardless of spelling, is getting them perfectly cooked.
The Secret to Perfectly Crispy Roasted Brussel Sprouts
The magic behind truly outstanding brussel sprouts lies in a few straightforward principles that maximize their natural sweetness and achieve that coveted crispy exterior. This isn't about complex techniques or exotic ingredients; it's about harnessing the power of high heat and proper preparation. By following these simple steps, you'll unlock the full potential of this humble vegetable.
Prepping Your Brussel Sprouts for Roasting Success
Proper preparation is the first crucial step towards achieving culinary perfection with your brussel sprouts. Neglecting this stage can lead to uneven cooking or a less-than-ideal texture. It's a quick process, but each step plays a vital role:
- Cleaning: Always begin by giving your brussel sprouts a good rinse under cold water. If you have a bit more time (say, 20 minutes), a short soak in a bowl of water can help dislodge any hidden dirt, though it's not strictly necessary. Just ensure they are thoroughly clean before moving on.
- Trimming: Look at the bottom of each sprout; you'll notice a tough, woody stem. Trim a small amount off the very end of this stem. Simultaneously, peel away any loose, discolored, or damaged outer leaves. These discarded leaves tend to burn or become unpleasant during roasting.
- Halving: This is a non-negotiable step for the best results. Cut each brussel sprout in half lengthwise through the stem end. Why? Halving ensures that all the sprouts cook more evenly. It also creates a flat surface that, when placed face-down on the baking sheet, allows for maximum contact with the hot pan, promoting beautiful caramelization and a wonderfully crispy texture. If you have some exceptionally large sprouts, quartering them might be beneficial for consistency.
Practical Tip: When selecting brussel sprouts at the grocery store, look for tight, firm, bright green heads. Avoid any with yellowing leaves or soft spots, as these indicate older produce that may develop more bitterness or a mushy texture when cooked.
Simple Ingredients, Maximum Flavor
One of the beauties of this brussel sprouts recipe is its reliance on minimal, readily available ingredients. You don't need a pantry full of specialty items to create something truly delicious:
- Brussel Sprouts: The star of the show, prepped as described above.
- Extra Virgin Olive Oil: This is more than just a coating agent. Olive oil not only helps the sprouts crisp up beautifully but also plays a significant role in mitigating any potential bitterness. Its natural fats contribute to a richer flavor and a more desirable texture. Ensure an even coating on all surfaces.
- Salt and Pepper: The fundamental seasonings. Use sea salt or kosher salt for better flavor and control. Freshly ground black pepper adds a pungent counterpoint.
While the basic trio above yields fantastic results, you can easily elevate your roasted brussel sprouts with a few optional additions. Consider a sprinkle of garlic powder or onion powder for an aromatic boost, a dash of smoked paprika for depth, or even a drizzle of balsamic glaze after roasting for a sweet-tangy finish. A grating of fresh Parmesan cheese in the last few minutes of cooking also adds a wonderful savory crust.
Step-by-Step Guide to Your Best Brussel Sprouts Recipe
With your ingredients ready and your sprouts prepped, it's time to bring it all together. This straightforward process guarantees crispy perfection every time.
- Preheat & Prepare: Position your oven rack in the middle and preheat your oven to 400°F (200°C). High heat is paramount for roasting, as it encourages browning and crisping rather than steaming. Line a large baking sheet with foil or parchment paper for easy cleanup.
- Clean & Trim: As detailed earlier, rinse your brussel sprouts thoroughly, trim the woody ends, and remove any loose outer leaves. Cut each sprout in half lengthwise.
- Toss & Season: In a large bowl, combine the halved brussel sprouts with a generous drizzle of extra virgin olive oil. Use your hands to toss them thoroughly, ensuring every sprout is evenly coated. Season generously with salt and freshly ground black pepper.
- Roast to Perfection: Arrange the seasoned brussel sprouts in a single layer on the prepared baking sheet, cut-side down. Crucially, do not overcrowd the pan. Overcrowding traps steam, preventing crisping and leading to a soggy texture. If necessary, use two baking sheets to ensure adequate space between the sprouts. Roast for 20 minutes.
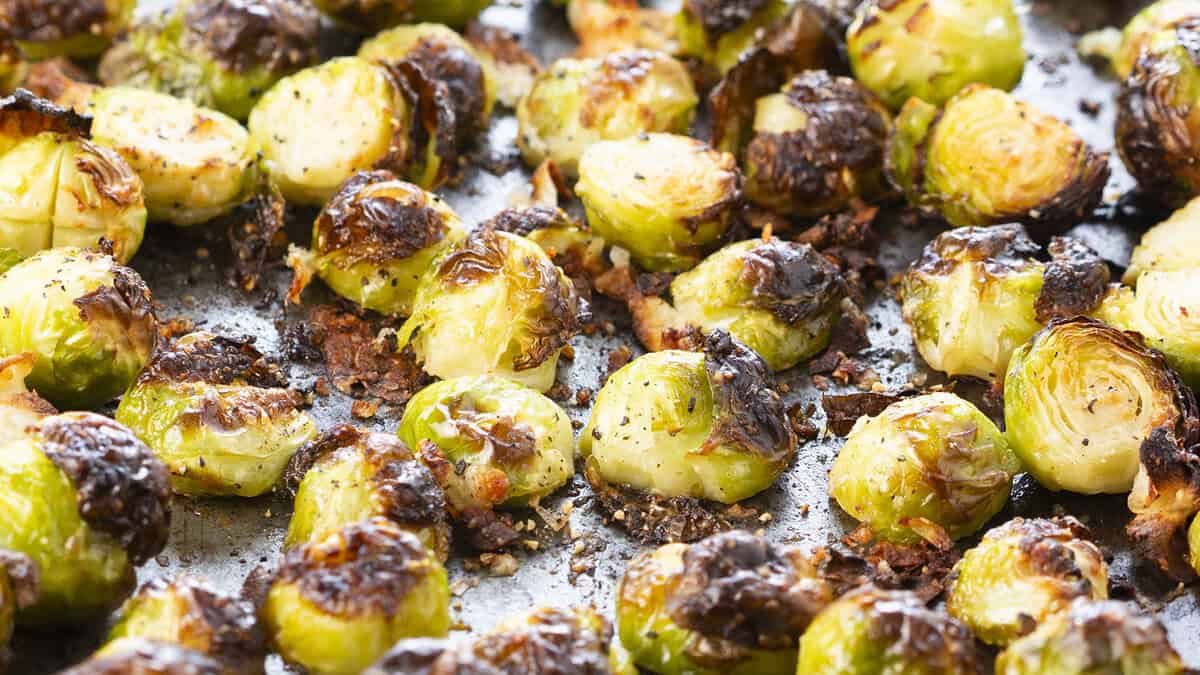
- Serve & Enjoy: Your brussel sprouts are done when they are easily pierced with a fork, their edges are beautifully browned and crispy, and some of the outer leaves have developed a delightful char. Remove from the oven, and serve immediately.
Common Questions & Troubleshooting Your Brussel Sprouts Recipe
Even with a simple recipe, questions can arise. Here are answers to common queries to ensure your brussel sprouts turn out perfectly every time.
Why are my brussel sprouts soggy?
Soggy brussel sprouts are usually a result of one of a few common mistakes:
- Insufficient Heat: Roasting at too low a temperature is the primary culprit. Always ensure your oven is preheated to a scorching 400°F (200°C). This high heat is what promotes caramelization and crisping.
- Overcrowding: Placing too many sprouts on a single baking sheet means they steam rather than roast. The trapped moisture prevents browning. Always spread them in a single layer with space in between.
- Steaming/Boiling/Parboiling: Some older recipes suggest parboiling or steaming brussel sprouts before roasting. For a truly crispy result, avoid these methods entirely. This recipe relies on direct dry heat to achieve that perfect texture.
How do I prevent bitter brussel sprouts?
Several factors contribute to bitterness, but this roasting method helps significantly:
- High Heat Roasting: The intense heat caramelizes the natural sugars in the sprouts, balancing out any bitterness.
- Extra Virgin Olive Oil: The natural fats in olive oil also play a role in mellowing the flavor profile.
- Freshness: Fresher sprouts tend to be less bitter than older ones.
- Cut in Half: Ensures even cooking and prevents overcooking which can sometimes bring out bitterness.
How do I know when my roasted brussel sprouts are done?
Perfectly roasted brussel sprouts should be:
- Fork-Tender: A fork should easily pierce through the center.
- Crispy Edges: The outer leaves and cut surfaces should be nicely browned and slightly charred.
- Caramelized: Look for a golden-brown hue, indicating the natural sugars have caramelized.
Don't be afraid of a little char; that's where much of the amazing flavor and texture come from!
Can I make these ahead?
While roasted brussel sprouts are best enjoyed immediately for peak crispness, you can certainly reheat leftovers. Store them in an airtight container in the refrigerator for up to 3-4 days. To reheat, spread them on a baking sheet and warm them in a 350°F (175°C) oven for 5-10 minutes, or until heated through and slightly re-crisped.
Pairing Your Perfect Roasted Brussel Sprouts
The beauty of this brussel sprouts recipe lies not only in its deliciousness but also in its incredible versatility. These crispy gems can effortlessly complement a wide array of meals, making them suitable for any occasion, from a simple weeknight dinner to a festive holiday spread.
- Meatless Meals: For a light and healthy option, pair them with zoodles, other roasted vegetables, quinoa, or incorporate them into a hearty grain bowl. They add fantastic texture and flavor to plant-based dishes.
- Classic Protein Pairings: Roasted brussel sprouts are an impeccable match for almost any protein. Think alongside a succulent roasted chicken, a perfectly seared steak, comforting meatloaf, tender pork tenderloin, or rich lamb chops. Their slight bitterness and crisp texture provide a wonderful contrast to richer meats.
- Flavor Boosters: A final squeeze of fresh lemon juice, a sprinkle of red pepper flakes for a kick, or a generous shower of grated Parmesan cheese can elevate your roasted brussel sprouts even further. For a gourmet touch, consider drizzling them with a good quality balsamic glaze just before serving.
Whether you're following a low-carb, keto, paleo, or simply a healthy eating plan, this quick and easy Brussel Sprouts recipe fits seamlessly into almost any diet, delivering deliciousness without compromise.
Conclusion
This simple yet powerful brussel sprouts recipe is a game-changer. By focusing on high heat, proper preparation, and minimal ingredients, you can consistently achieve perfectly crispy, flavorful, and non-bitter brussel sprouts that will delight everyone at your table. Say goodbye to the days of mushy, unappetizing sprouts and welcome this delicious, versatile side dish into your weekly meal rotation. Give it a try tonight, and prepare to fall in love with brussel sprouts all over again!
